Developer quick start
Welcome to Phantombuster!
As a developer, in just a few minutes you'll be able to navigate to any page, extract and export its data.
To get started, we wrote the following step-by-step guide to extract the data on the front page of Hacker News and download the data in various formats (CSV and JSON).
Before we start: Orgs, Phantoms and BusterJS
Orgs, Phantoms and BusterJS are the core of Phantombuster.
When you sign up for an account on Phantombuster, an org is automatically created for you. It contains the agents you'll use and the scripts you'll code. Your org contains your catalog of Phantoms that you can share or not. e.g., Phantombuster's catalog is public.
Usage of the term "Phantom"
⚠️A Phantom is a term intended for non-technical users which designates both a script (which is listed in an org's catalog) and an agent (which is an "instance of a script" listed in an org's dashboard). When developing on the Phantombuster platform, we recommend not using this term as it conflates both concepts.
Phantoms handle all your scraping and automation. They are actually made of:
- a script: to define the navigation scenario and the data to retrieve
- an agent: it is a configured "instance" of its associated script
- a setup: to configure your agent schedule execution, notifications, etc.
BusterJS is the main library you'll use to write your scraping scripts: it is the interface between your scrapers and all the features available on Phantombuster. It is maintained by Phantombuster's developers and will always be. Here are some of the built-in features:
- Agent scheduler
- S3 cloud storage
- CAPTCHA solver
- Proxy pools
Check out our complete guide about BusterJS if you would like to know more.
Puppeteer vs other headless browser libraries?
Puppeteer is a project initiated by Google. It is a state-of-the-art Node library which provides a high-level API to control Chrome or Chromium. It is open-source, check it out on GitHub!
⚠️We used to develop and maintain a headless-browser library called NickJS which is now deprecated since it predates Puppeteer. Please consider migrating to Puppeteer if you are using NickJS.
Enable developer mode
Phantombuster's developer mode adds developer-specific advanced options across the app, those options will be required to fully complete this guide.
For instance, the developer mode will add a new Developer link on your account's dropdown. It will also unlock features such as Edit code for your custom scripts or code snippets to easily use our API.
If you signed up as a developer on Phantombuster, the developer mode will be enabled by default, if not, head over to your user settings page and click Enable developer mode.
Set up a new custom script
Related resources
In this section, we will set up your first script. This will only be an overview, we wrote various guides for you to get familiar with Phantombuster. Two linked articles might interest you:
- Managing my custom scripts: entire walkthrough of a Phantombuster's custom script lifecycle.
- Complete guide on script directives: detailed instructions on how to code a script, the environment your scripts will run in, and how to configure it.
Create your script
Under your developer's page, you will find a Create script button: click on it and set a name (no extension needed).
Branch your script into the "master" branch
On your script, open the management menu and click Branch into.... You will be asked for a branch name, let's keep it as default: "master".
Code your script
Open our code editor
Head to your script's page or to your catalog. Open your script's management menu, and click Edit code. In our editor, you can write any JavaScript you want, we will execute it from the cloud! Here is a simple HackerNews scrapper to start with:
"phantom image: web-node:v1"
"phantombuster flags: save-folder"

/**
 * The upper part is phantombuster configuration
 * Check out our guide on writing custom scripts
 * @see: https://hub.phantombuster.com/docs/script-directives
 * If you would like to know more about script directives
 */

const Buster = require("phantombuster")
const buster = new Buster()
const puppeteer = require("puppeteer")

;(async () => {
  const browser = await puppeteer.launch({
    // This is needed to run Puppeteer in a Phantombuster container
    args: ["--no-sandbox"]
  })

  const page = await browser.newPage()

  // core of your scrapper should go there!

  await page.close()
  await browser.close()
  process.exit()
})()
API References:
Load an URL and check for success
We load URLs by opening new tabs, just like a regular browser.
It's best practice to ensure our page has successfully loaded the HTML elements we need.
await page.goto("https://news.ycombinator.com")
await page.waitForSelector("#hnmain")
API References:
Manipulate the page and access content
Say we want the list of posts and their respective URLs. In the browser, we inspect the page and see the data is presented in anchors with the class "storylink".

Back to our scraping script, to put that data in an array, we replicate what we would do in the browser inspector/console and evaluate a function in the DOM.
At the end of the evaluation, we simply pass the return value of this function in the callback.
const hackerNewsLinks = await page.evaluate(() => {
  // we are in the browser's context
	const data = []
	document.querySelectorAll("a.storylink").forEach((element) => {
		data.push({
			title: element.text,
			url: element.getAttribute("href")
		})
	})
	return data
})
How come we can run JavaScript "in the console"?
A headless browser acts just like a regular browser, except it doesn't have a graphical interface (roughly speaking, no screen, mouse, keyboard or buttons to click on).
It is possible to inject any library using a CDN using Puppeteer
E.g. for UnderscoreJS:
page.addScriptTag({ url: "https://cdnjs.cloudflare.com/ajax/libs/underscore.js/1.8.3/underscore-min.js" })
Return data as JSON
To send the array of results back to Phantombuster as JSON simply use setResultObject().
await buster.setResultObject(hackerNewsLinks)
Take a screenshot of the page
A screenshot() is a good debugging tool. If the screenshot doesn't look like what you expect, chances are the data you scraped won't either.
await page.screenshot({ path: "hacker-news.png" })
Catch errors and end the script
Catching errors with async/await is easy.
try {
  await riskyScrapingJobThatMightThrow()
  console.log("Job done!")
  process.exit()
} catch (error) {
  console.error(`Something went wrong: ${err}`)
  process.exit(1)
}
Create an agent and run it!
Head to your script's page, and click "Use this Phantom" (this is a user friendly way of saying "Create an agent from this script).
Go through the setup, you will arrive on your agent's console. You should open your console to debug your script open your management menu and click Toggle console. You can now launch it and see it run live!
The console is the dashboard of your agent, it mainly contains:
- The success and error messages
- The files saved (in this case the screenshot, but it could be any other image, text or CSV file you saved)
- Your JSON Result object
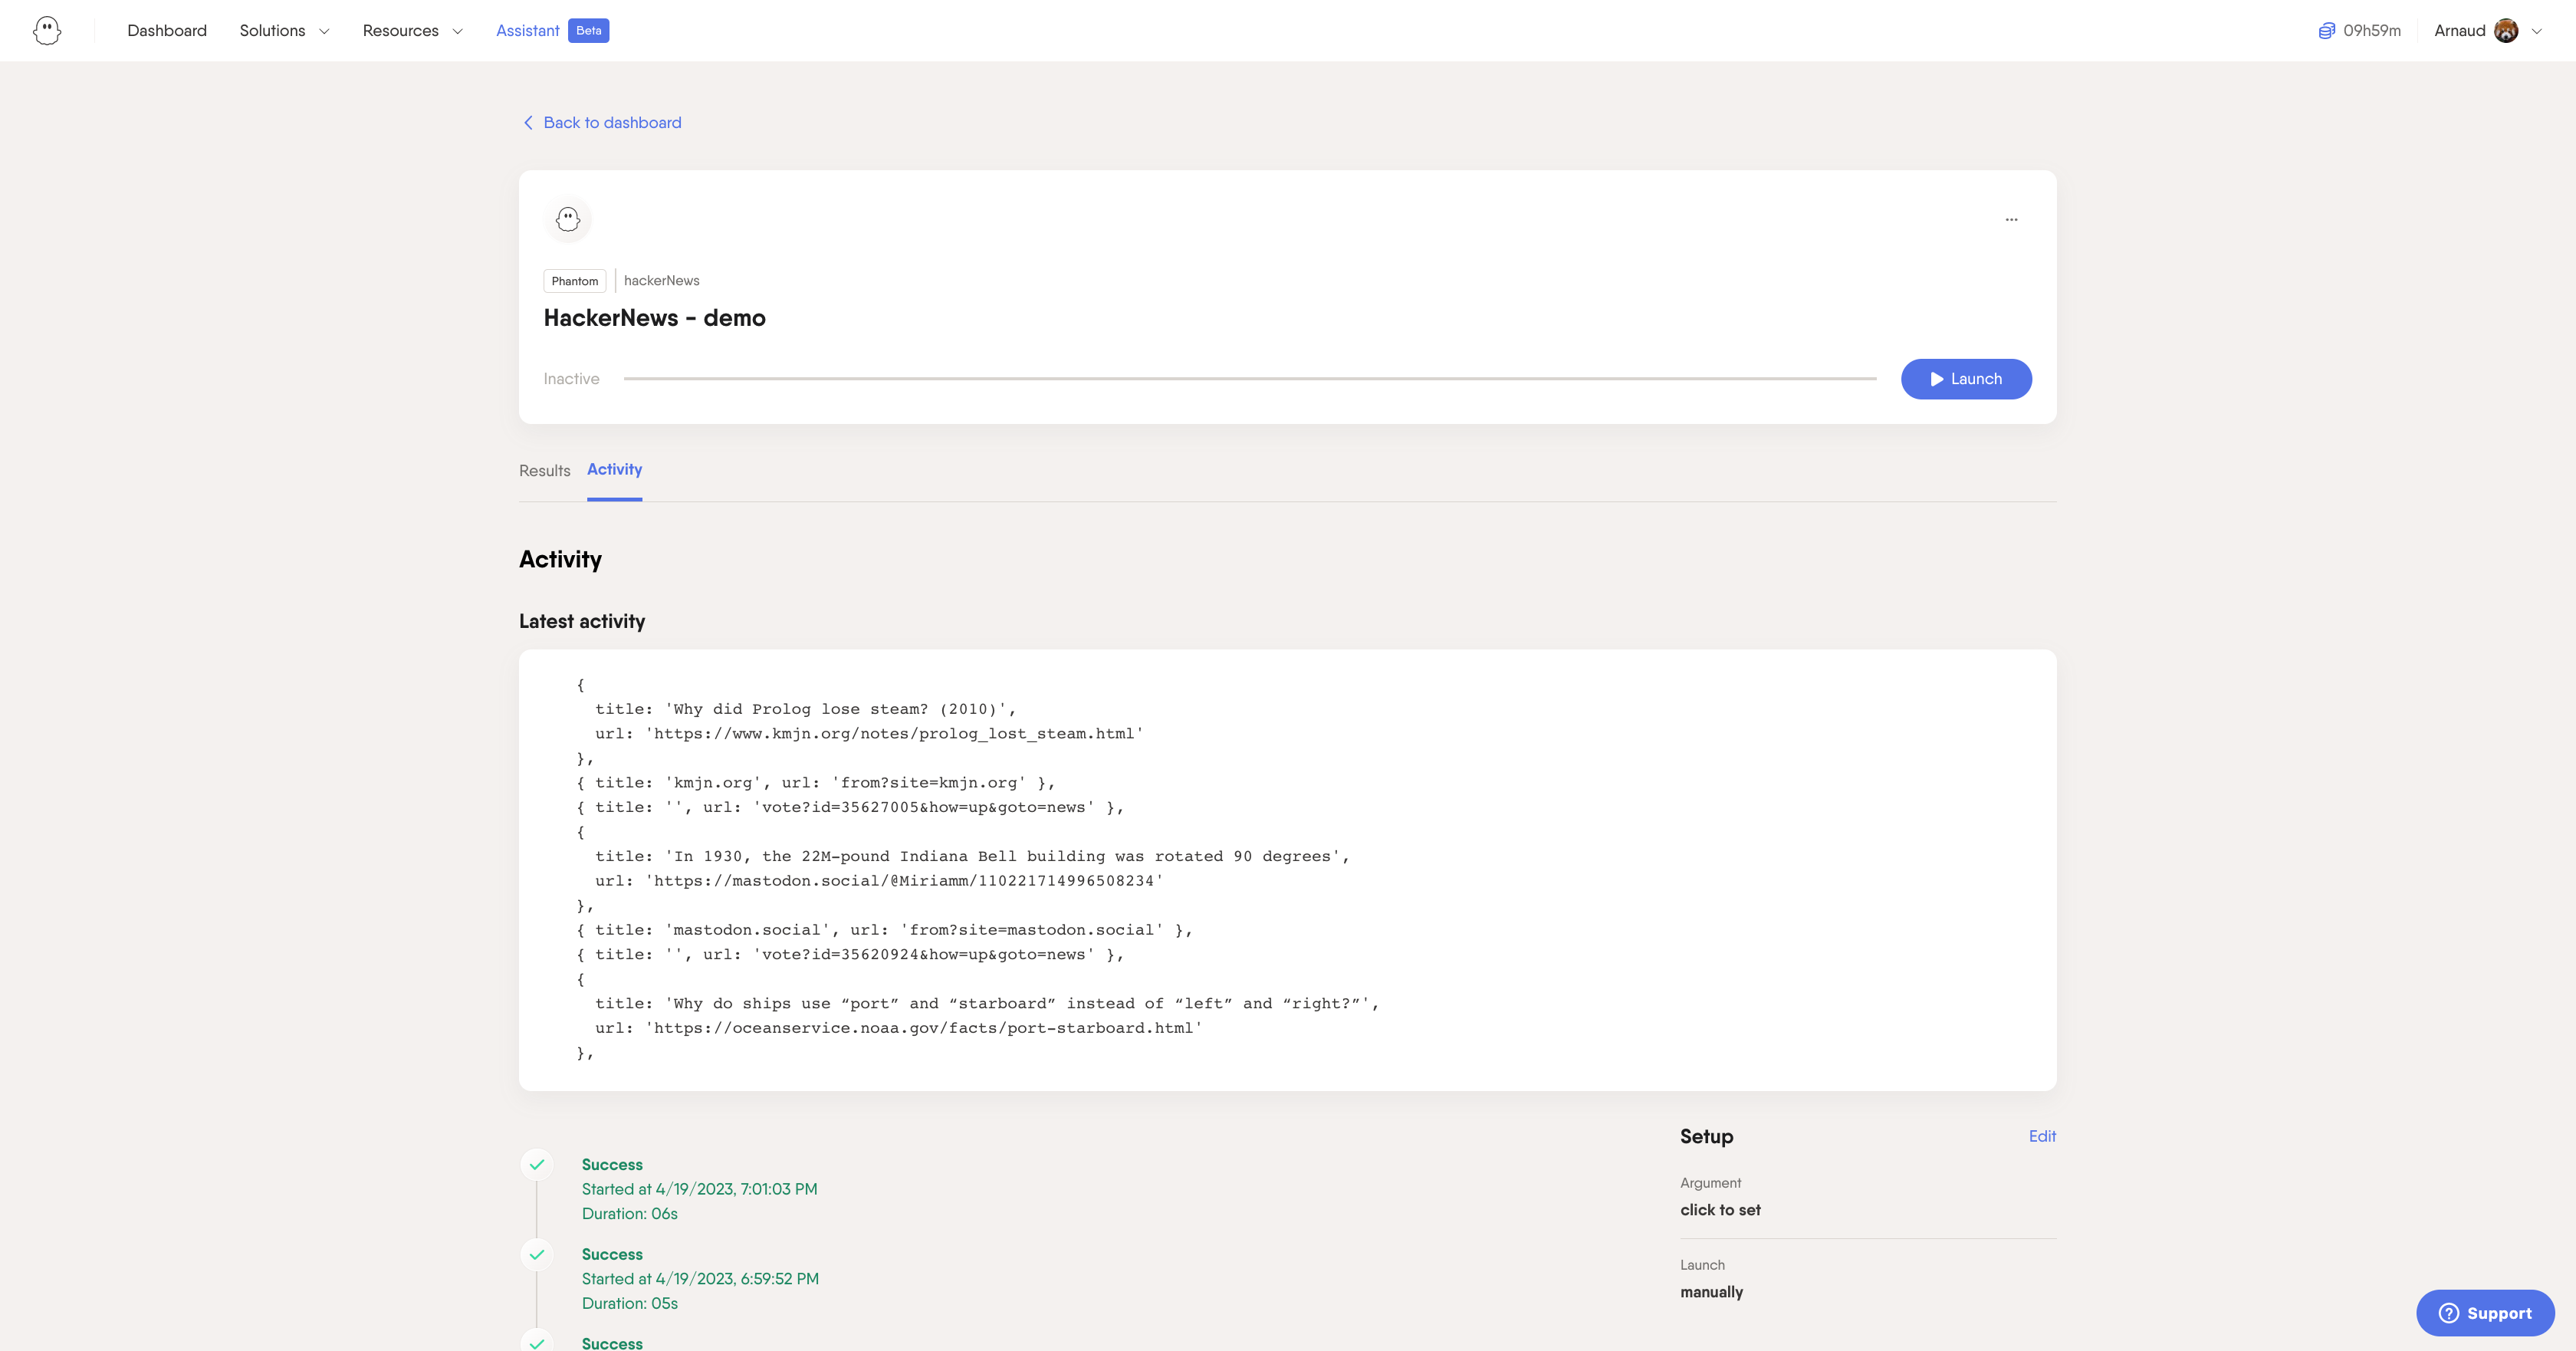
See all your results and files in the console!
That's it! Congratulations on your first scraping job with Phantombuster :)
API
You can also launch your agent through an API call. We wrote a guide on how to programmatically control your Phantombuster account.
Updated about 3 years ago